
 how-to
How to Prepare Home for Kitchen Remodeling
Table of Contents
- Assess Your Current Kitchen Layout and Renovation Goals
- Set a Realistic Remodeling Budget
- Establish a Kitchen Remodel Timeline and Project Schedule
- Create a Temporary Kitchen Setup Ideas for Daily Living
- Plan for Meals and Dining Alternatives During Construction
- Protect Your Home: Floor Protection and Dust Containment
- Communicate with Contractors and Manage the Project
- Conclusion
Last Updated: August 26, 2026
Assess Your Current Kitchen Layout and Renovation Goals
Understanding how to prepare home for kitchen remodeling starts with a clear-eyed assessment of what you're working with. Before you call contractors or start dreaming about granite countertops, spend time measuring your current space and identifying what's actually broken versus what you simply want to change.
Walk through your kitchen with a tape measure and notepad. Document the dimensions of your room, the location of windows and doors, and the placement of major appliances. Note which fixtures are failing (leaking faucet, broken cabinet hinges, outdated electrical outlets) and which are simply dated. This distinction matters because it shapes your budget and timeline.
Take photos from multiple angles. These become reference points for contractors and designers. They also help you remember what you're leaving behind, which sounds odd, but many homeowners regret losing architectural details they didn't photograph before demolition.
Consider your daily workflow. Where do you prep food? Where do family members congregate? What frustrates you most about the current layout? A kitchen remodel is the moment to fix fundamental problems, poor lighting over the sink, a stove positioned away from prep space, or a refrigerator that opens into traffic flow. Once you identify these pain points, you can prioritize them in your design.
If you're working with a designer or contractor, this assessment becomes the foundation of your project scope. Documenting your current setup thoroughly prevents scope creep later. When you have baseline photos and measurements, change requests become obvious deviations rather than forgotten details.
Set a Realistic Remodeling Budget
Budget conversations are uncomfortable because they force you to choose between competing priorities. But they're essential to how to prepare home for kitchen remodeling without financial shock.
Start by understanding what drives kitchen remodel costs in your area. Materials, labor rates, and permitting fees vary significantly. A modest kitchen refresh in Greer differs in cost from a full gut renovation with custom cabinetry. Research what similar projects have cost by talking to neighbors, checking online reviews, and getting multiple quotes from local contractors.
Allocate your budget across major categories: cabinetry (typically 30-35% of total cost), countertops and backsplash (15-20%), appliances (10-15%), flooring (10-15%), plumbing and electrical work (10-15%), and contingency (10-15%) (nahb.org). That contingency buffer matters more than you think, hidden issues like rotted subfloors or outdated wiring almost always emerge once demolition begins.
Be honest about what you can and cannot afford to compromise on. High-end appliances look great but won't make or break your renovation. Quality installation and proper permitting, however, absolutely will. A skilled contractor costs more upfront but prevents expensive mistakes later.
Get everything in writing. Detailed estimates from contractors should itemize labor, materials, and timeline. This protects you if scope changes or unexpected issues arise. HOME MEDICS LLC emphasizes clear communication about budget constraints from the start, it shapes every decision your contractor makes and prevents surprises at invoice time.
Consider whether you're financing the project through savings, a home equity line of credit, or a personal loan. Each option has different implications for your timeline and decision-making flexibility. Financing matters because it affects how much buffer you can build into your budget for the unexpected.
Establish a Kitchen Remodel Timeline and Project Schedule
A realistic kitchen remodel timeline prevents you from living in chaos longer than necessary. Most kitchen renovations take 4-12 weeks depending on scope, but the actual duration depends on several factors you need to understand upfront (nkba.org).
Permitting can add weeks. If your remodel involves electrical or plumbing changes, moving walls, or upgrading to modern code compliance, you'll need permits from your local municipality. In Greer and surrounding areas, permitting timelines vary but typically take 1-3 weeks for approval once submitted (the CDC). Factor this in before demolition begins, you cannot legally start structural or electrical work without permits in place.
Demolition and prep work usually takes 1-2 weeks. This includes removing old cabinets, countertops, flooring, and fixtures. If asbestos or lead paint is present in older homes, testing and abatement add time and cost. Dust containment and debris removal are part of this phase.
Rough-in work (plumbing, electrical, HVAC modifications) typically takes 1-2 weeks. This is when your kitchen looks most chaotic, walls are open, utilities are exposed, and the space is unusable.
Installation phases follow: new framing or structural work, then drywall and finishing, then flooring, then cabinetry and countertops, then final fixtures and hardware. Each phase depends on the previous one being complete, so delays cascade.
Final inspections and punch-list work add another 1-2 weeks. Inspectors verify that electrical and plumbing work meets code. Contractors address any issues identified before final payment.
A detailed project schedule from your contractor should list each phase with start and end dates. Weather, material delays, and contractor availability all affect the timeline. Building a 10-15% time buffer into any estimate is realistic, not pessimistic.
Communicate your timeline needs clearly. If you need the kitchen functional by a specific date (holiday gathering, before selling the house), tell your contractor upfront. They can adjust sequencing or crew size if necessary, though that typically increases cost.
Create a Temporary Kitchen Setup Ideas for Daily Living
Living without a functional kitchen for weeks is the part of kitchen remodeling that tests your patience. A temporary kitchen setup makes the difference between manageable inconvenience and genuine hardship.
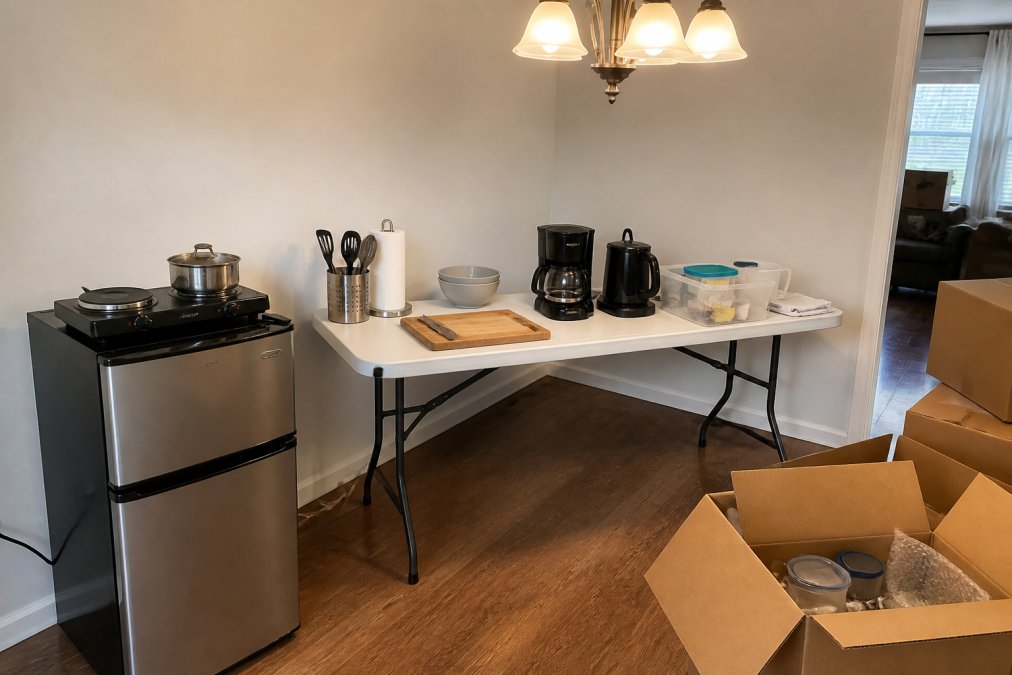
Start by identifying where your temporary kitchen will live. A dining room, garage, or basement works if it has access to water and electricity. You need counter space, electrical outlets, and ideally proximity to your main living area.
Stock your temporary kitchen with essentials: a portable cooktop or hot plate (electric models are safer than propane in enclosed spaces), a small refrigerator or cooler with ice, a microwave if you have counter space, a coffee maker, and basic cooking utensils. A folding table serves as your prep and eating surface. Dish racks, cutting boards, and storage containers keep things organized.
Plan your meals around what you can prepare without a full kitchen. Slow cooker meals, sheet pan dinners, and no-cook options reduce your dependence on cooking equipment. Many families use this period to order takeout more frequently, budget for that reality.
Discuss with your contractor where they'll store materials and where you can safely access your temporary kitchen without interfering with their work. Dust and debris migrate quickly, so keep your temporary setup separated from the active work zone if possible.
Consider the practical logistics: Where will you wash dishes? Can you use a bathroom sink or do you need a separate station? Where will you store groceries? How will you handle laundry if your washer and dryer are in the kitchen? These questions sound trivial until you're living them.
Prepare your family for the temporary arrangement. Kids adapt better when they know it's temporary and when routines remain as normal as possible. Eating dinner together at a folding table in the dining room beats eating separately because the kitchen is unusable.
Plan for Meals and Dining Alternatives During Construction
How you approach meals during your kitchen remodel affects your sanity and your budget. This deserves planning as serious as the renovation itself.
Your options fall into a few categories. Cooking at home using your temporary kitchen setup requires discipline and realistic meal planning. Takeout and restaurant meals offer convenience but add significant expense over weeks. Many families use a combination: simple home meals on weekdays, takeout on weekends.
If you have a grill, it becomes your best friend. Grilled chicken, vegetables, and simple sides require minimal equipment and reduce your dependence on the temporary kitchen. A grill setup in your backyard extends your cooking options without adding to indoor chaos.
Batch cooking before the remodel begins helps. Prepare and freeze meals that reheat easily in your microwave or on your portable cooktop. Soups, stews, casseroles, and marinated proteins can be made ahead and stored.
Some families rent a small commercial kitchen space or use a community kitchen facility if available. This option costs money but allows normal cooking and eating routines. In Greer and the surrounding area, check with local churches, community centers, or cooking schools about rental options.
Be realistic about eating out more than usual. If your family normally spends $400 monthly on groceries, expect to spend $600-800 when you're buying prepared food and eating out. This is a legitimate project cost, budget for it.
Communicate meal plans with your contractor. They need to know when you'll be using your temporary kitchen setup so they can plan their work schedule around meal preparation times if necessary. Coordination prevents conflicts.
Stock your temporary kitchen with non-perishable staples before demolition begins: pasta, rice, canned vegetables, broth, spices, oils, and condiments. This foundation makes temporary cooking less stressful.
Protect Your Home: Floor Protection and Dust Containment
Dust and debris from kitchen demolition and construction infiltrate every corner of your home if you don't actively prevent it. Floor protection and dust containment are investments that pay dividends in cleanup time and air quality.
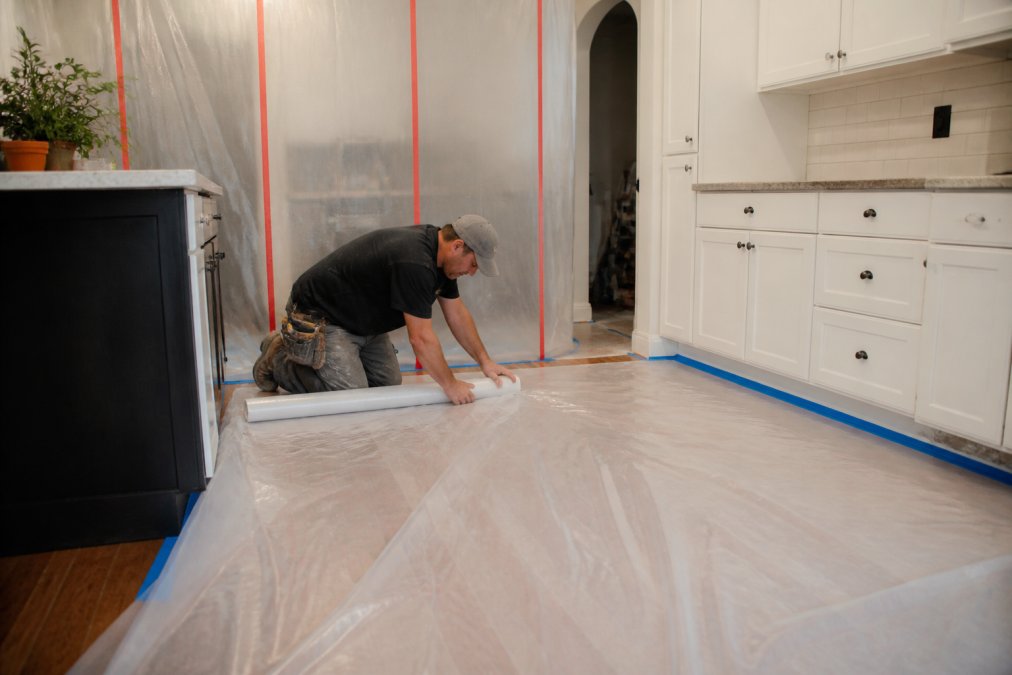
Start with floor protection. Contractors typically lay down plywood or heavy plastic sheeting in the kitchen and along pathways they'll use to access the work area. This protects your flooring from spills, dropped tools, and foot traffic. If you have hardwood or tile floors, this protection is essential, replacement costs dwarf the cost of protective materials.
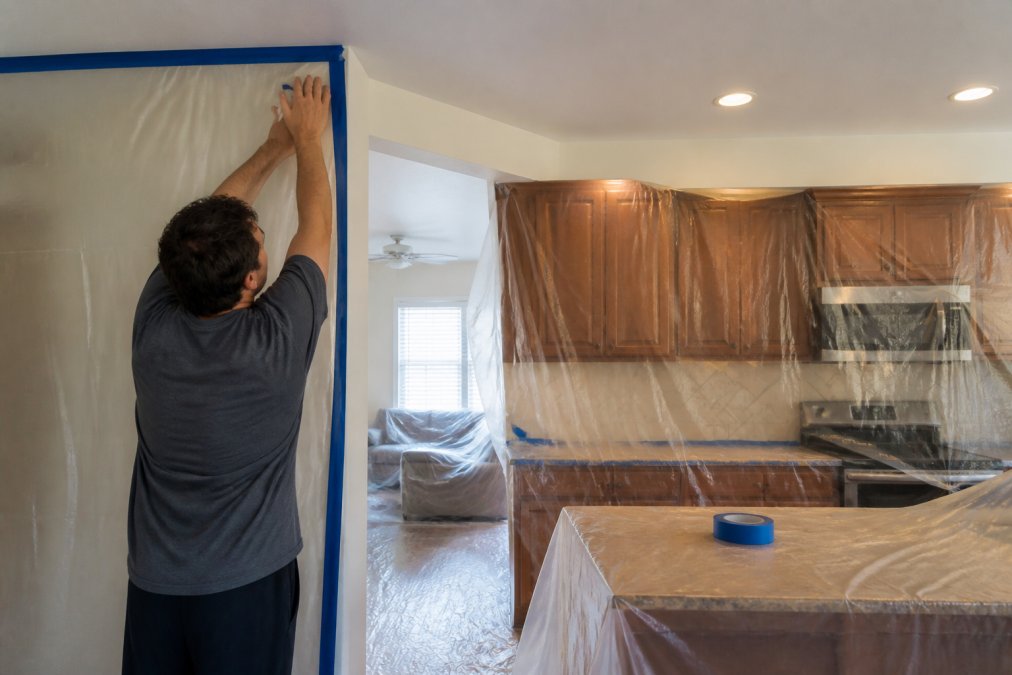
Dust containment requires barriers between the work zone and the rest of your home. Plastic sheeting hung from ceiling to floor, sealed with tape, creates a containment wall. Your contractor should establish this before demolition begins. The goal is to confine dust to the active work area.
HVAC management matters. Ask your contractor whether they'll seal off return air vents in the kitchen to prevent dust from circulating through your ductwork into other rooms. Sealing registers costs nothing but prevents expensive ductwork cleaning later.
Air quality during a kitchen remodel deteriorates quickly without management. Portable air scrubbers or HEPA filters help capture airborne dust. Some contractors include these; others charge extra. Understand what's included in your contract.
Establish a dust management protocol with your contractor. How frequently will they clean the work area? What's their process for removing debris? Will they use wet methods (misting to control dust) or dry methods? Wet methods are messier initially but contain dust more effectively.
Protect your furniture and belongings in adjacent rooms. Even with barriers, fine dust settles on surfaces. Cover furniture with sheets or move items to rooms farther from the work zone.
Your temporary kitchen setup should be outside the dust containment area if possible. If not, cover it thoroughly at the end of each workday. Dust on your dishes and food preparation surfaces is unacceptable.
Communicate with Contractors and Manage the Project
How you communicate with your contractor determines whether your kitchen remodel feels collaborative or adversarial. Clear, consistent communication prevents misunderstandings and keeps the project on track.
Before work begins, establish communication preferences. How often will you connect? Phone calls, text updates, or in-person check-ins? What time of day works best? Clarify what decisions require your input and what falls within the contractor's discretion.
Schedule a pre-construction meeting with your contractor, designer, and anyone else involved in the project. Walk through the space together. Discuss the project scope, timeline, budget, and any concerns. Document what's discussed, email a summary to confirm everyone's understanding.
Request a detailed project schedule. This should list each phase, expected start and end dates, and any dependencies. A realistic schedule accounts for material delivery times, weather delays, and inspector availability. Ask about contingencies if delays occur.
Establish a process for handling change orders. If unexpected issues emerge (rotted framing, outdated electrical systems requiring upgrades), document the scope change, cost impact, and timeline impact before proceeding. Never agree to changes verbally, require written change orders.
HOME MEDICS LLC emphasizes that professional contractors in Greer and the surrounding area understand the value of transparent communication. Licensed and insured contractors document their work, provide regular updates, and address concerns promptly. If your contractor resists communication or avoids discussing problems, that's a red flag.
Schedule regular site visits to observe progress. Don't micromanage, but stay informed. Ask questions about decisions you don't understand. A good contractor welcomes questions and explains their reasoning.
Address issues immediately if they arise. A small problem caught early is easily corrected. The same problem discovered after the next phase is exponentially more expensive to fix.
Keep copies of all contracts, change orders, permits, and invoices. These documents protect you and clarify expectations. If disputes arise, written documentation is your defense.
Pay according to the contract terms, typically in installments tied to project phases. Never pay the full amount upfront. Most disputes arise from payment timing, contractors stop work if they're not paid, homeowners withhold payment if they're unhappy. Clear payment terms prevent this dynamic.
Preparing your home for kitchen remodeling requires planning across multiple dimensions: understanding your current space, setting a realistic budget, establishing a timeline, arranging temporary living solutions, protecting your home from dust and damage, and maintaining clear communication with your contractor. The effort you invest upfront prevents expensive mistakes and reduces stress during the renovation itself. When you're ready to move forward with a kitchen remodel in Greer or the surrounding area, HOME MEDICS LLC offers licensed, insured expertise in managing complex renovation projects from start to finish. Our team handles the coordination, quality control, and problem-solving so you can focus on envisioning your new kitchen. Get a free estimate and let's discuss how to prepare your home properly for the transformation ahead.
Frequently Asked Questions
Q: How do I set up a temporary kitchen during a remodel?
A: Set up a temporary kitchen in a dining room, garage, or bedroom with essential appliances like a hot plate or portable induction cooker, a cooler for perishables, and a folding table for prep work. Stock paper plates, cups, and utensils to minimize cleanup. Keep a small supply of non-perishable foods, snacks, and beverages nearby. Position the temporary kitchen close to a water source if possible. This setup keeps your family fed without relying on restaurants throughout the construction phase.
Q: What should I pack away before kitchen demolition begins?
A: Pack away all small appliances, utensils, dishes, glasses, and food items at least one week before demolition starts. Store items in labeled boxes in a bedroom or garage away from the construction zone. Remove decorative items, cookbooks, and anything on open shelving. Secure cabinet doors and drawers if they'll remain during early phases. Close off the kitchen from the rest of your home with plastic sheeting to contain dust and debris. This prevents damage to your belongings and makes it easier for contractors to work.
Q: How long does a typical kitchen remodel take?
A: A standard kitchen remodel timeline typically ranges from 6 to 12 weeks, depending on the scope of work. Simple updates (new countertops, backsplash, paint) may take 4-6 weeks. Full renovations involving structural changes, electrical upgrades, plumbing relocation, and custom cabinetry can extend to 12-16 weeks or longer. Delays occur when contractors discover hidden issues during demolition or if permits take longer than expected. Always build in a 2-3 week buffer when planning your kitchen remodel timeline to account for unexpected complications.
Q: How do I protect the rest of my home from construction dust?
A: Seal off the kitchen with plastic sheeting over doorways and vents to create a dust containment barrier. Use HEPA-filter air purifiers in adjacent rooms to capture airborne particles. Place door mats and shoe covers at the kitchen entrance so workers don't track dust throughout your home. Keep windows closed during active construction and ask contractors to minimize dust by using wet-cutting methods for tile and stone. Change HVAC filters more frequently during the project. These steps significantly reduce dust migration to bedrooms, living areas, and other parts of your home.
This article was written using GrandRanker